Learning how to light a pre roll properly changes everything about your smoking experience. Most people grab a lighter and hope for the best, but a few simple techniques make a real difference. When you light it correctly, your pre-roll burns evenly, tastes cleaner, and lasts longer without constant relighting.
This guide covers everything you need to know, from checking your pre-roll before you light it to fixing burn problems as they happen. Whether this is your first time or you just want better results, these techniques will help you get a smooth, consistent burn every single time.
Key Takeaways
- The most important thing to remember is toasting the tip before your first puff, which means holding the flame near the twisted end for a few seconds to dry it out and prepare an even burn across the entire surface.
- You also need to keep rotating the pre-roll while you light it so every side gets equal heat exposure, which prevents that annoying one-sided burn that wastes your product and creates harsh smoke.
- Checking for proper airflow before lighting by taking a gentle test pull tells you if the pre-roll is packed correctly, and this simple step saves you from struggling with a too-tight or too-loose roll that won't stay lit or burns too fast.
What Should You Check Before Lighting a Pre Roll?
Taking 30 seconds to inspect your pre-roll before lighting prevents most common problems. This quick check tells you if you’re good to go or if you need to make small adjustments first. A little attention here saves you frustration later when you’re trying to enjoy a smooth session.
How to inspect the tip and paper?
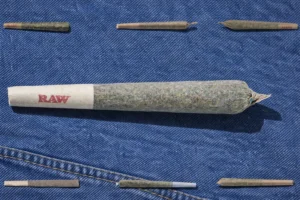
- Start by looking closely at the twisted tip where you'll be applying flame. The paper should be sealed properly without any tears, gaps, or loose sections that could cause uneven burning or let smoke escape from places it shouldn't.
- Run your fingers gently along the entire seam of the pre-roll to check that it's fully closed. Any openings in the paper will throw off the burn pattern and make one side burn faster than the other.
- Check the colour of the paper itself. Quality pre-rolls typically use white or natural light brown papers. Dark spots or discoloration usually mean that section will burn differently from the rest, so you'll want to watch those areas carefully when you light up.
Why does airflow matter before lighting?
Put the pre-roll between your lips without lighting it and take a gentle test pull. You should feel air moving through smoothly without too much resistance. This simple test tells you everything about how the pre-roll is packed inside.
Good airflow means it will stay lit easily and burn at the right speed. When there’s too much resistance, the pre-roll is packed too tight and will keep going out on you. If air rushes through with almost no resistance, it’s too loose and will burn way too fast while getting hot near the filter.
Should you grind or adjust a pre roll?
Most pre-rolls come ready to smoke right out of the package, but sometimes small adjustments help. Here’s what you can do:
- If the tip feels loose or floppy, give it a gentle twist to tighten things up and create a more secure seal at the end you'll be lighting.
- Tap the filter end lightly against a table or hard surface a few times to settle the contents more evenly throughout the pre-roll, which helps prevent air pockets that cause uneven burning.
- Avoid opening up a pre-roll to regrind the contents unless something is seriously wrong, because the manufacturer already prepared it at the right consistency and opening it usually creates more problems than it fixes.
What Is the Best Way to Hold a Pre-Roll While Lighting?
The way you hold your pre-roll during those first few seconds of lighting directly affects how well it burns. Getting your grip and angle right from the start prevents most burn problems before they even happen.
How finger placement affects the burn?
Hold the pre-roll between your thumb and index finger about halfway down from the tip. This gives you solid control while keeping your fingers at a safe distance from the flame. Your grip needs to be firm enough to control the rotation but not so tight that you squeeze the pre-roll and restrict airflow or change its shape.
Keep the filter end pointing slightly downward so you can see exactly what’s happening at the tip. Some people hold it straight out, but that makes it harder to watch the burn pattern develop.
Why does angle matter when lighting?
Tilt the pre-roll at roughly a 45-degree angle when you bring the flame close. This position works with gravity to help distribute heat more evenly across the tip. Flames naturally rise, so angling the pre-roll means you’re using that upward movement to your advantage instead of fighting against it.
Never hold it straight up and down while lighting because that can cause problems with how the paper burns and makes it much harder to get an even cherry started. The angle also protects your fingers from getting uncomfortably close to the heat.
How Do You Light a Pre-Roll Step by Step?
Following these steps in the right order gives you the best shot at a perfect burn every time. Each step builds on the previous one, so skipping ahead usually causes the exact problems you’re trying to avoid.
Step 1: How to toast the tip evenly?
Hold your lighter flame just below the twisted tip without actually touching the paper. Keep the flame close enough that you can feel the heat working but not so close that everything catches fire immediately.
Rotate the pre-roll slowly in your fingers while the heat does its work. You’ll notice the tip starting to glow orange and the paper will darken slightly around the edges.
This toasting process dries out the tip and prepares it for an even burn across the whole surface. The whole thing takes about 3 to 5 seconds. If you rush through this part, you’ll almost always end up with one side burning way faster than the other.
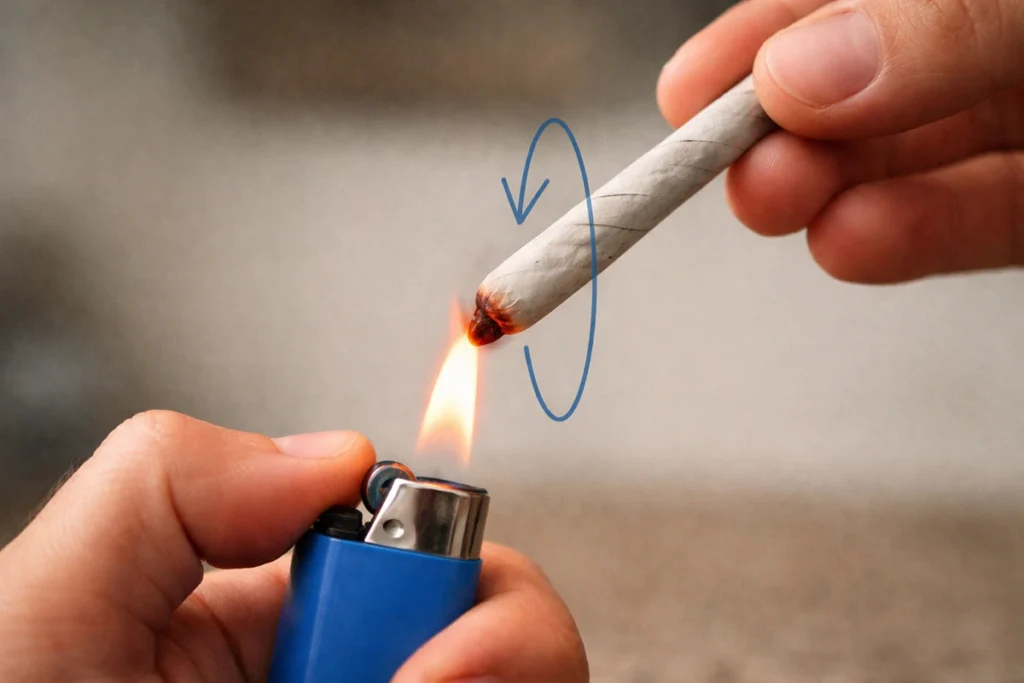
Step 2: How to rotate the pre roll while lighting?
Once the tip is nicely toasted, bring the flame a bit closer and keep that rotation going. Turn the pre-roll slowly and smoothly with your fingers, making sure every part of the tip gets the same amount of heat exposure.
Your rotation should feel smooth and continuous, not jerky or rushed. You’ll see the cherry start to form as the cannabis catches and begins to burn. Keep rotating even after you spot the first glow of the cherry. Your goal here is lighting the entire circumference of the tip, not just getting one section going.
Step 3: When to take the first puff?
After the tip glows evenly all the way around, pull the lighter away and take a slow, gentle draw. This first puff should feel easy and relaxed. You’re not trying to inhale hard or pull a big cloud right away.
You’re just helping that cherry establish itself and spread across any spots that might have missed the initial lighting. If the cherry looks bright and even after your first puff, you nailed it. If only part of it appears lit, give it another quick rotation with the lighter while taking small, easy puffs.
Step 4: How to avoid burning the paper?
Focus the flame on the cannabis itself rather than directly on the paper. The paper will catch naturally once the contents start burning properly. When you aim the flame right at the paper, it burns too fast and creates a harsh, unpleasant taste that nobody enjoys.
Watch the colour of the smoke as a guide. Light grey or white smoke means everything is burning clean and correctly. Dark or black smoke usually signals that you’re burning paper or the pre-roll hasn’t dried properly.
Looking for quality pre-rolls in NYC? Check out what’s available from trusted local sources that focus on proper preparation and quality materials.
How Can You Tell If a Pre Roll Is Lit Correctly?
Knowing what a properly lit pre-roll looks like helps you catch problems early when they’re still easy to fix. Most issues are much simpler to handle in the first minute than after the pre-roll has been burning for a while and the problem has gotten worse.
Signs of an even burn
A correctly lit pre-roll shows several clear indicators:
- The cherry glows bright orange all the way around the circumference, not just on one side or in patches, and the ash forms evenly in a cone shape that's light grey or white in colour.
- When you look at the pre-roll from the side, the burn line runs straight across rather than diagonal or wavy, and the smoke flows smoothly when you take a puff without any sputtering, crackling, or popping sounds.
- The draw feels easy and natural without requiring you to pull hard to get smoke, and the filter stays warm but not uncomfortably hot to hold, which tells you the burn rate is right where it should be.
What canoeing looks like and how to stop it?
Canoeing happens when one side of the pre-roll burns faster than the other, creating a shape that looks like a canoe running down one side instead of burning evenly across. This wastes your product and makes the smoke taste harsh and unpleasant.
Stop it as soon as you notice it happening. Lick your finger and dampen the fast-burning side to slow down that section and give the other side a chance to catch up.
You can also rotate the pre-roll so the slower side faces upward, letting gravity help even things out. If dampening doesn’t work, gently blow on the slower side to encourage it or briefly apply the lighter to that lagging section.
What Should You Do If Your Pre Roll Burns Unevenly?
Uneven burning happens to everyone and it’s usually fixable without wasting product or starting completely over. Most of the time you can correct the problem with a quick adjustment and keep your session going smoothly.
How to fix one sided burning?
- Turn the pre-roll so the slower-burning side sits on top and take a few puffs while holding it in this position. The extra airflow to that side often helps it catch up with the faster side naturally.
- If that doesn't work after a few puffs, use the dampening technique by licking your finger and applying moisture to the faster-burning side to slow it down temporarily.
- For stubborn cases that don't respond to rotation or dampening, carefully scrape off excess ash from the faster side using your lighter or a small tool, which reduces the head start that side has and gives the slower side room to catch up.
When to relight vs adjust the paper?
Knowing when to relight versus when to adjust the paper saves you time and frustration:
- Relight when the pre-roll goes completely out and the cherry is cold to the touch. Let it cool for a few seconds, then toast the tip again just like you did at the start and take gentle puffs to get it going.
- Adjust the paper if you see it peeling away or burning separately from the contents inside. Gently press loose paper back down or lick it to stick it back in place where it belongs.
- Sometimes you need to trim burned paper with your fingers if it's getting in the way of an even burn or creating extra harshness in the smoke.
How Should You Store a Half Smoked Pre Roll?
Not everyone finishes a pre-roll in one session, and that’s perfectly fine. Storing the remainder properly keeps it fresh and enjoyable for your next session instead of letting it dry out or pick up bad flavors.
How storage affects freshness?
A half-smoked pre-roll dries out faster than an unlit one because the tip is exposed and the contents have been heated, which removes moisture. Dry cannabis burns too fast and tastes harsh when you relight it.
Too much moisture causes different problems though, making the pre-roll hard to relight or potentially leading to mold if stored improperly. The smell also intensifies after you’ve smoked part of it, so what you store it in matters if you don’t want everything nearby smelling like smoke.
Best place to keep it for later use
Follow these storage steps for best results:
- Put out the cherry completely by stubbing it gently against a hard surface or running the very tip under a tiny bit of water, making absolutely sure it's fully extinguished before storing to prevent any fire risk.
- Use a small glass tube with a cap or an airtight container like a medicine bottle or smell-proof bag to protect the pre-roll from getting crushed while containing the odor effectively.
- Keep the container in a cool, dark place away from direct sunlight or heat sources like car dashboards, which can dry out or degrade what's left of your pre-roll.
- Plan to use stored pre-rolls within a few days to a week for the best taste and experience, as the quality starts declining after that even with proper storage.

Is There a Safer Way for Beginners to Light a Pre Roll?
First-time users face different challenges than experienced smokers, mainly around controlling the flame and managing that first inhale. A few beginner-specific approaches make the whole process safer and more comfortable right from the start.
Tips for first time users
- Start with a quality lighter that produces a steady, reliable flame instead of cheap lighters that sputter and make it harder to control the burn. Hemp wick offers another option that burns at a lower temperature than butane lighters and gives you more precise control.
- Light your pre-roll outdoors or in a well-ventilated space for your first few times, because fresh air makes the experience more comfortable and reduces the chance of feeling overwhelmed by smoke in an enclosed area.
- Take your time with each step and don't rush through the lighting process just because you're nervous. Slow, deliberate movements give you better results and help you stay in control of what's happening.
How to avoid coughing and discomfort?
Managing your first experience well sets you up for better sessions going forward:
- Take smaller puffs than you think you need because new users often inhale too much too fast, which triggers immediate coughing. Short, shallow draws work perfectly fine for getting started, and you can always take another puff.
- Skip holding smoke in your lungs for a long time because a second or two is plenty and holding it longer doesn't accomplish anything useful while making your throat more irritated and scratchy.
- Keep room temperature water nearby and sip it between puffs to soothe your throat and prevent that uncomfortable feeling that leads to coughing fits.
- Wait a full minute or two between puffs when you're just starting out, giving your body time to adjust to the experience rather than rushing from one puff to the next.
Final Thoughts
Getting your lighting technique right makes every session more enjoyable and efficient. The steps might feel like a lot when you’re reading through them, but they become second nature after a few practice sessions. Focus on toasting the tip properly, keeping that rotation steady while lighting, and watching for signs of even burning as you go.
Every pre-roll burns a little differently based on factors like paper thickness, how tightly it’s packed, and moisture levels in the cannabis. Pay attention to what works with each one and adjust your approach as needed. Quality makes a real difference too. Well-made pre-rolls with good paper and properly cured cannabis burn more consistently and give you fewer headaches than cheaper alternatives.
Practice turns this whole process into something you do without thinking. Your first few attempts might not be perfect, and that’s completely normal and expected. Each session teaches you something new about flame control, reading the burn pattern, and making quick fixes when needed.
Always follow your local laws and regulations regarding cannabis use. If you have specific health questions about how cannabis might affect you personally, talk to a healthcare professional who can give you advice based on your individual situation.
Ready to try quality pre-rolls? Subscribe to our newsletter for practical tips, local recommendations, and updates on the best cannabis products in your area. We send straightforward advice you can actually use, delivered right to your inbox.
Frequently Asked Questions
How long should you light a pre roll before puffing?
Toast the tip for about 3 to 5 seconds before taking your first puff. The tip should glow slightly and the paper should darken without catching fire. Once the tip is evenly toasted all around, take a gentle draw while continuing to apply the flame. This helps the cherry get started properly across the entire surface.
Why does my pre roll keep going out?
Pre-rolls go out when they’re packed too tightly or the cannabis inside is too moist. Tight packing restricts airflow, which the cherry needs to stay lit. Moist cannabis won’t maintain a steady burn. Taking longer breaks between puffs can also cause it to go out naturally. Keep a consistent smoking pace and check for good airflow before lighting.
Can you light a pre roll more than once?
Yes, you can relight a pre-roll multiple times without any real issues. Let it cool down for a few seconds if it goes out, then toast the tip again just like you did initially. Relighting once or twice doesn’t affect the quality much. Just make sure the cherry is completely out before storing it for later use.
Is it bad to burn the paper while lighting?
Burning too much paper creates a harsh taste and wastes material. A little paper burning is normal and unavoidable, but focuses most of the flame on the cannabis itself. The paper catches naturally once the contents start burning. If you notice lots of black smoke or taste something chemical, you’re burning too much paper directly.
Should beginners light pre rolls differently?
Beginners follow the same basic steps but should go slower and use extra caution. A hemp wick can be easier to control than a standard lighter for first-timers. Start with smaller puffs and take breaks between them to avoid coughing. Practice in a well-ventilated area with water nearby. The technique stays the same, just at a more relaxed and deliberate pace.